Showing posts with label stained glass. Show all posts

Monday, March 4, 2019

Purchasing Stained Glass and Mosaic Tile Tools


Many potential hobbyists who would like to start creating their own unique stained glass projects are overcome by the cost and sheer amount of stained glass and mosaic tile tools that are recommended to enter the hobby.

When faced with the initial cost of purchasing the basic hand tools like  pliers, glass cutters, glazing hammer, fid, lead came vise, soldering irons, ring saws, band saws, grinders, and finally a selection of stained glass; many people simply find the cost too exorbitant to enter the  hobby.

Fortunately, there several companies that offer quality "starter" or "start up" tool sets for beginners at economical prices that include all the hand tools needed for working with stained glass.


The package above on the right includes everything necessary to start creating stained glass suncatchers almost "out of the box".

As the proficiency of the hobbyist improves, most beginners will start to acquire more specialized tools that make constructing their projects easier.

Foil dispensers or "automatic" foilers are usually one of the first items purchased to make foiling less tedious.


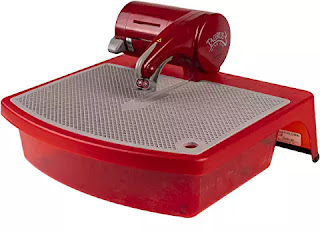
Later on, the majority of hobbyists that decide to stick with the hobby will eventually purchase a circle or ring saw, band saw, or a high end grinder to make the job easier, especially if they plan to sell their creations online. 

The couple of examples below are best sellers that are versatile and have spare blades and parts readily available.


This is important when you break a belt or cutting blade and need a quick replacement to finish your project.

In short, getting into the hobby of creating unique stained glass suncatchers, wall hangings, windows, table tops, etc. can be as economical or expensive as you can afford.

These days it's as simple as clicking on a website online and waiting for your order to arrive on your doorstep.

More on Mosaic Tiles to come.


Thursday, December 25, 2014

The Joys Of Stained Glass Plating

Stained glass plating has been practiced since late in the last century when Louis Comfort Tiffany and John La Farge began the practice in earnest. Both did a lot of plating during their lifetimes.

Plating, also called overlay in stained glass terminology, involves using more than a single layer of stained glass in your projects. The Plating of stained glass together allows you the freedom to use any color or texture combination.

Each layer of stained glass is soldered on top of other layers to provide a variety of three dimensional effects.

Plating is not commonly practiced in the construction of stained glass suncatchers for several reasons.

First and foremost, when viewed from the front, stained glass plating looks great. However, when viewed from the back of the suncatcher or panel, plating looks much less aesthetic, in fact it can look plain ugly. This is because most plating occurs on the reverse of the suncatcher or panel.

Many stained glass artisans shy away from plating for a variety of reasons, but why do they bother with plating in the first place?  Well, there are several reasons.

Plating transforms an otherwise common piece of work into a truly unique, "one of a kind" work of art like the example below that was created by Chuck Franklin Studios.

Waterfall Window
 
Typical of stained glass done by Tiffany studios in the early 1900′s, this window features plating and the attaching of pieces to the front of the window to give it a 3-D effect.   The plating of several layers of glass on top of each other produces the rich colors and depth. The logs in the foreground were rounded and protruded from the rest of the window.

When done properly, plating adds a sense of distance to a piece. It will also make your solder or lead lines look less distinct.

Plating can also be used to add "shading" and other effects to your piece.

Plating glass together does not restrict you to a single color, texture or type of stained glass. You can superimpose images on top of each other using different types of stained glass to achieve many desired effects.

To create the effect of "distance" to a piece, the layer closest to the viewer should be a thick, dense, opal glass. A dense glass diffuses the light that passes through the various layers and gives the desired diffused look.

A lot of Tiffany panels have been made with this effect.

When you want to add shading to your piece, you need a relatively dense glass or the lines become too pronounced.

When superimposing images on top of each other, you need to complete the background first. The second, "plating layer" is then superimposed on top of the completed background to create a sculptured effect that when done correctly will not have lead lines.

Another three dimensional effect that can be created by plating is a "faceted" or "ragged" effect.

To achieve this effect, multiple layers of stained glass are placed over each other. The best "faceted" effect can be achieved by organizing the different plated layers to give them a "more intense" look. The layers absorb more light and should cast shadows on other parts of the work.

You can make any piece look "rougher" by varying the angles of the plated glass on the upper layers.

There are some problems associated with Plating stained glass; accurate cuts, moisture, and weight distribution being the most prominent.

Depending on the pattern, accurate cuts become central to Plating stained glass projects; especially when one layer needs to be placed exactly on top of another layer.

Moisture can also be a problem when two layers are placed exactly on top of each other, however both problems can easily be handled by making accurate cuts and thoroughly drying each layer before soldering.  When constructing layers, dry each layer thoroughly with a hair dryer as you build up your project.  

You can also allow residual moisture to escape by providing a "vent" between layers is the layers are large.   This can be done by putting a dollop of Vaseline on the top and bottom of the plated piece before soldering. The Vaseline stops the solder from holding at these locations and allows for the release of moisture that can build up and destroy the look of your project.

Occasionally the soldering flux will spit or spatter between the layers during soldering. When this happens, you have to de-solder the piece, clean it, and re-solder.

Another problem with multilayer plating is that it becomes almost impossible to lay the project flat on your work surface to solder.  To keep your project level during soldering, you need to support the various layers of stained glass from underneath so the weight of the panel is equally distributed.

When plating only a few areas of a wall hanging or a panel, you need to take into account the weight distribution of the completed panel. The weight of the panel is no longer carried through the vertical plane of the glass.

When adding smaller more complex curves and shapes to a piece, it is more likely to have the necessary strength than when you add longer, narrower pieces which are more likely to bow or "warp". Since most stained glass Platings are a work in progress, add curves to your design to provide strength to the project.

You will encounter major weight distribution problems when the bottom portion of the panel is constructed from a single layer of glass and the upper portion is a multilayer construction. The entire project will be top heavy.

You can solve the problem by adding a clear piece of glass plate to the back of the piece, on the very bottom, to offset the weight distribution. You will have problems if you decide to frame the piece, but you can always carve away the bottom section of a frame to accommodate the increased width if you are using a wooden frame.

Because of the complexity of their design, most plated stained glass pieces have no set pattern. Their designs are modified while under construction, usually with the aid of light boxes.

 If you decide to experiment with Plating, you can either start with an existing panel and add a layer or two, or start with a design of your own and add to it as the project grows. Get a base design and add a layer or two. Try out different types and color combinations until you are happy with your outcome.

When plating onto an existing panel, reduce the solder lines on the back of the panel to a flat line. Then cut the plating pieces and solder them onto the panel.

Plating is to some extent a trial and error process. Take your time and experiment with it. You will be surprised with the results you can achieve.

Arts & Craft Books

Saturday, November 9, 2013

Fun With Bottles

If you're into stained glass, you can have fun with bottles and recycle them by incorporating them into your stained glass projects.

How to make them part of your stained glass project is entirely up to your fertile imagination however, here are a couple of ideas you may want to consider.

Cut off wine bottle bottoms to create unusual stained glass windows or wall hangings.

Use your grinder to reduce the edge thickness of the bottle bottoms to match the stained glass you are using, foil and then solder together as you would any other stained glass project.

Cut the bottoms off various sizes of different colored bottles to create unique wind chimes.

   Once the bottoms have been cut off, grind the edges even, drill holes in them about 1/4" in from the edge and tie them together using monofilament or PowerPro Braided Spectra Fiber Micro Filament Line - 100-150 Yards.

Wall hangings and panels are a great way to use the bottoms of colored bottles or a bottle cut in half lengthwise.

The video below shows how to cut a bottle in half lengthwise using a band saw.  The trick is to go slowly and let the blade do the work.


The idea of cutting the tops of bottles to make a set of drinking glasses has been around for years.

Once you cut the bottles tops off (using the method of your choice) you need to smooth the edges so they are suitable for drinking.

The best and easiest way to achieve a "factory" edge on your newly created drinking glass is to use a propane or Mapp Gas plumbers torch.

Mapp gas burns hotter than ordinary propane so pay attention when heating up the glass.

Once you adjust the torch to get a blue flame, heat the entire glass evenly and gradually concentrate on keeping the flame on the rough edges around the rim.  The sharp edges will eventually melt into a bead.

Heating the glass EVENLY is important to keep the glass from shattering.

Personally, I don't like drinking from "bottle" glasses because of their rim thickness.  I prefer using the cut bottles for indoor planters or making wind candles.

Some stained glass artisans have fun with bottles by breaking or cutting different colored bottles into manageable pieces and using them in suncatchers or wall hanging projects.

(This requires a kiln to slump or flatten out the pieces.)

The video below shows one method of cutting the tops off of bottles using the Gryphon C40 glass cutting band saw.


Another method I use on a regular basis that works just as well requires a jig and is less costly, but takes longer.

First you need to make a simple jig using 3/4" (1x4) pine boards and a few sheet rock screws or glue to hold the bottle secure when scoring.
  • Cut two pieces of the 1x4 about 16" to 18" long and screw or glue them into a "V" shape.  
  • Next make the bottle stop by screwing or gluing a 7" or 8" piece of 1x4 to one end of the vee.  The bottom of the stop needs to be flush with the bottom of the vee.
  • You can add a hand rest if you like by screwing another piece of 1 x 4 to the shorter side of the vee and to the back of the bottle stop.
That's all you need to hold most bottles secure enough to make an even cut around the circumference of the bottle.

Place the bottle in the jig with the bottom flush against the stop and cut around the circumference with your glass cutting tool by rotating the bottle slowly and keep the cutting wheel on the glass until it meets on the other side.

As soon as the bottle is scored, you need to tap the score from the inside with a "tapping" tool to break off the top of the bottle.

You can either purchase a tapping tool or make one from a length of brass rod bent at the end with a nut or some other weight soldered up from the bend to add weight.

The list for having fun with bottles is endless, but the main trick is learning how to cut the bottles easily without hurting yourself in the process.

Arts & Craft Books

Thursday, October 10, 2013

What To Do With Scrap Glass

What to do with scrap glass is something we all have to contend with if you have been creating stained glass projects for any length of time.

But what exactly is scrap glass?

In our society where waste is commonplace; I believe that there is no such thing as scrap glass or scrap anything for that matter.

Scrap glass is nothing more than unused small pieces of beautiful colored glass.  Like garbage, scrap to one individual is a gold find to another. 

I'm quite sure that L.C. Tiffany didn't regard the tiny pieces left over from his lampshades as scrap.  He simply used them to create other more intricate patterns.

Other than the obvious uses for "scrap glass" (mosaics, wall hangings, small suncatchers, etc.) the real problem is how to organize unused pieces so you can easily find them in the creation of new projects.

Organization by size, the type of stained glass and the color will bring some order to the chaos of your scrap glass box.

Once order is achieved, you can use your fertile mind to create uses for each category or mixture of stained glass categories.

Now, what to do with scrap glass?
  • Most stained glass artisans use their scraps in mosaics of some type.  
Smaller scraps can be glued to a variety of bottles, plates, trays, objects, etc. to create unique mirrors, picture frames, stepping stones, suncatchers, wall hanging, table tops, or even to fill in small floor areas.  

If you are using small scrap glass for any floor area where there is a danger of being cut by the sharp edges, it pays to "ease" the edges of the glass shards by tossing them in a rock tumbler like the  Lortone 3a Tumbler - 3lb Capacity - TUM-110.00 pictured at the above left.
 
  • If you are into creating unique lampshades like L.C. Tiffany;  scrap glass already has a great end use for the creation of intricate lampshade patterns.
  • Smaller sized stained glass suncatchers are always a great end use for smaller pieces of scrap glass. 
  • Windchimes and mobiles are a great end use for scrap glass pieces.   
The smaller pieces are perfect for making small birds, butterflies, crosses, free style pieces, etc.  

Small wire loops can be used for the hangings or you can drill the glass when practical to do so.
  • Scrap glass can be slumped and fused to create a variety of projects  if you happen to be the owner of a kiln. 
Finally, if you have run out of fresh ideas you can always sell your scrap glass on eBay, donate it to a shcool or a church group, or just give it all away to someone who really needs it.

Remember, there is really no such thing as scrap glass.


Arts & Craft Books