Showing posts with label suncatchers. Show all posts

Monday, March 4, 2019

Purchasing Stained Glass and Mosaic Tile Tools


Many potential hobbyists who would like to start creating their own unique stained glass projects are overcome by the cost and sheer amount of stained glass and mosaic tile tools that are recommended to enter the hobby.

When faced with the initial cost of purchasing the basic hand tools like  pliers, glass cutters, glazing hammer, fid, lead came vise, soldering irons, ring saws, band saws, grinders, and finally a selection of stained glass; many people simply find the cost too exorbitant to enter the  hobby.

Fortunately, there several companies that offer quality "starter" or "start up" tool sets for beginners at economical prices that include all the hand tools needed for working with stained glass.


The package above on the right includes everything necessary to start creating stained glass suncatchers almost "out of the box".

As the proficiency of the hobbyist improves, most beginners will start to acquire more specialized tools that make constructing their projects easier.

Foil dispensers or "automatic" foilers are usually one of the first items purchased to make foiling less tedious.


Later on, the majority of hobbyists that decide to stick with the hobby will eventually purchase a circle or ring saw, band saw, or a high end grinder to make the job easier, especially if they plan to sell their creations online. 

The couple of examples below are best sellers that are versatile and have spare blades and parts readily available.
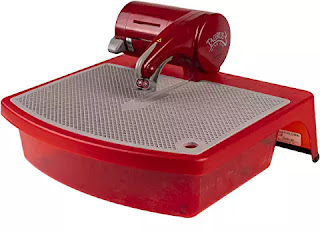


This is important when you break a belt or cutting blade and need a quick replacement to finish your project.

In short, getting into the hobby of creating unique stained glass suncatchers, wall hangings, windows, table tops, etc. can be as economical or expensive as you can afford.

These days it's as simple as clicking on a website online and waiting for your order to arrive on your doorstep.

More on Mosaic Tiles to come.


Saturday, March 7, 2015

Collecting Sea Shells For Suncatchers

Collecting sea shells for your suncatcher projects is an enjoyable way to get some fresh air, exercise,  and stock up on supplies without spending any of your hard earned cash.

Among other uses, sea shells are often used to enhance the look of stained glass suncatchers and give them a unique look.

Although they can be purchased online from a variety of sources, collecting sea shells is simply a matter of walking the beach at low tide and picking up as many as you can carry.  An hour before and an hour after a low tide is a great way to start a shell collecting trip.

If you are a Florida resident or reside in a State that boarders the Gulf, Atlantic, or Pacific Ocean,  collecting sea shells is not a problem.

Hit the beach as the tide is going out and you can usually pick up more sea shells than you could use in a lifetime.  Some areas of the beach will hold literally tons of shells, while other areas of the same beach can be totally barren.

This is due to a variety of factors such as moon phase, wind direction, bad weather, currents, etc.   All play a part in which areas of the beach will hold shells and which beaches are best for collecting them.

Some areas of Florida are noted for collecting sea shells and are identified by the stars in the map listed below.

Other areas are not as well known but may hold as many, if not more varieties of sea shells.

When you have collected all the shells you want, you need to clean them and restore them to their original color.

The video below demonstrates how this can be accomplished using a diluted Muriatic Acid solution.


Once the acid solution cleans the calcium deposits from the shells, they can be sprayed with clear lacquer or polyurethane to seal in the color.

After drying, the shells can be used in your suncatcher project or for whatever other project you can dream up.

Collecting sea shells is a lot of fun and even if you don't live on the coast, you can always set aside a day or so during your vacation time for collecting sea shells for your suncatchers, wall hangings, or wind chimes.  

Give it a try, it doesn't cost you a dime.


Arts & Craft Books

Thursday, May 8, 2014

How to Make Wind Chimes For Use With Your Stained Glass Suncatchers

Learning how to make wind chimes for use with your stained glass suncatcher hangings is not difficult once you have the basics down pat.

Wind chimes have been around for a long time and are used throughout the world not only for their aesthetic value but as a holistic source of mind healing.

The tones emitted by wind chimes vary considerably.  They can be gentle low bongs, to low whistles, to high pitched tings and clacks.  The material that the wind chime is made of determines what type of sound is emitted.

One thing you can be certain of is that listening to any type of wind chime will give you a feeling of peace and tranquility.

Learning how to make stained glass suncatcher wind chimes was covered in a previous post so we will not rehash that subject.  Instead, we will concentrate on how to make wind chimes to hang from your stained glass projects.

Fortunately, making your own wind chimes is a very inexpensive proposition.  You can use items you already have around your home or are ready to pitch to the scrap heap.


Regardless of the materials used, almost all round wind chimes follow the same basic design pattern, with a four part construction sequence.
Round Pipe Wind Chime
  • The "lid"
  • The center "banger"
  • The lower wind "catcher"
  • The surrounding "chimes"
The center mounted wind catcher is comprised of a "banger" attached to a lower wind "catcher"

The center "banger" hangs in the middle of the wind chime and bangs into the surrounding sound producing materials (chimes) as the wind "catcher" is moved around by the wind.

The "lid":

Because most wind chimes are circular in design, you need a lid at the very top of your wind chimes to spread apart the sound producing materials.  Without a lid of some sort you would have a tangled mess.

Pick any colorful round lid for this purpose.  If you don't have one of the color you desire, pull out a can of spray paint and give it a shot of paint to your liking.

When your lid is dry, locate the center and punch a tiny hole through it with an awl.

Next, slide a piece of fishing monofilament or nylon thread through the hole and tie a bulky knot in it on the top side of the lid.

Measure the monofilament or thread to the length you desire and cut it.

Next, decide on how many hanging chimes you are going to use in your wind chime.

The number should be even numbered; 2, 4, 6, 8 or more in order to maintain balance.

Each hanging chime should have another chime hanging directly opposite to it.

Lay out the position of the holes needed on the outside of the lid and punch the holes through the lid as evenly as possible with the awl.

The center "banger":


The next step is to install the center "banger" of choice in the center of the lid.

The material you choose for the "banger" is important.

It must be of sufficient mass and hard enough to create a noise when it hits the chime material, yet light enough to be easily pulled into the surrounding chimes by the lower wind catcher.

If it is too large or too heavy, the wind catcher below will not be able to move the "banger" with the breeze and the wind chimes will not work effectively.

Once you have a suitable material, (preferably something round or circular) install your chosen banger at the center point of the center string in the lid.

The lower wind "catcher":


that is surrounded by several chimes.   The beautiful sounds you hear are made when the banger is pulled by the lower wind pickup into the sound producing chimes.

Just below the "banger" at the base of the center string, install your wind catcher.

The wind catcher can be anything that has the ability to catch a breeze.  Anything with a large flat surface will work just fine as long as it has some weight to it.

A wide piece of stained glass, a small plastic lid or even a large cut off spoon will work just fine.

The surrounding "chimes":

The next step is to hang the chimes at the proper distance from the lid and at the same height as the center "banger".

The hanging height is important because in order to make the chime sound pleasant, the center "banger" must be able to hit the chimes with enough force to create a pleasing sound.

To give your finished wind chimes a unique look, the string length of your chimes can vary but in order to work properly, it must be balanced.

If you have one chime 6" long, the chime opposite it should also be 6" long if it is made from the same material.

If using hollow pipe, bamboo, etc. you can vary the lengths of each chime to offset the weight and length of each piece of string.  This gets a bit complicated and requires a lot of trial and error to keep everything in balance.


If you use the same materials and match up the lengths of each chime with the chime opposite it, you should have no problems.

Drill holes through the tops of each of the chimes and the wind catcher before you attach them to the string.  This way they will hang evenly when the job is complete.

Hanging the Wind Chime to the Suncatcher:

Punch two more holes in the lid spaced evenly apart from the center.  Slide a length of monofilament through one hole and tie a large knot at the bottom to hold it in place.

Measure the amount of mono you want for the hanging loop, and cut it to length.  Then thread the end of the monofilament through the second hole and again tie a large knot to hold.

Your wind chime is now complete and can be hung alone or from the bottom ring of your reinforced stained glass suncatcher project.

Sit back and let the sounds of the chimes heal your soul.


Arts & Craft Books

Saturday, March 29, 2014

Transforming Your Ideas Into Stained Glass

Transforming your ideas into glass suncatchers or wall hangings is entirely possible when you have something to work with.

Creating stained glass suncatchers is fun and profitable but like anything else you can get tired of replicating the same patterns (with slight modifcations) that everyone else is making.

Creativity making stained glass suncatchers is limited only by your imagination and your ability to transform them into a real products.

Here are some ideas on how you can accomplish it.
  • You went deep sea fishing with friends and was lucky enough to land a beautiful Mahi Mahi (dolphin).  Idea: Dolphin Suncatcher
  • You went for a drive in the local wildlife refuge and saw a beautiful pair of Wood Ducks.  Idea: Wood Duck Suncatcher
  • You took a walk and saw some beautiful Monarch butterflies on a milkweed plant.  Idea: Butterfly Suncatcher
  • On a spring walk in the woods you noticed a beautifully colored salamander under a rotted tree stump.  Idea: Spotted Salamander Suncatcher
  • You spotted some waterfowl while on the beach.  Idea:  Pelican Suncatcher
All of the above have potential and are great prospects for transforming your ideas into stained glass suncatchers. 

The first step is to record your idea to some sort of media you can work with.

If you are artistic, you can simply draw or etch your ideas on paper, wood, etc. for future use.  If you are totally void of artistic abilities, just take a picture or video of your ideas for future reference.

Original Picture of Pelican
A cheap, pocket size digital camera is a great way to record things you have seen for future reference.

Snap pictures of your ideas and when you get home transfer the pictures to your computer. 

Then use any simple picture viewer to manipulate your images.

There are many free software programs available that can manipulate pictures, but IrfanView is one of the best and easiest to use.

Edge Detected Photograph of Pelican
It has an "edge detection" feature in the "effects" menu that you can use to more easily trace patterns from the copied pictures or photos on your computer. 

The next step is to make a copy or copies of the pictures you choose to transform into stained glass suncatchers.

If you do not already have a home copy machine, I strongly recommend purchasing any brand of "all in one" copier. 

These units have a copy, scan and fax feature built into one machine.  There are many brands available and most are reasonably priced.

Use heavy card stock paper so you can cut out and re-use the pieces after you trace and transfer the pieces onto the stained glass.  Office Depot or Staples has the paper available at reasonable prices.

Once you have copied the "edge enhanced" picture that you manipulated from the original photograph, you can use a led pencil or magic marker to trace out the glass pieces. 

Make sure the pieces you trace from the copy can be easily cut from stained glass.

During this step you do not need to get fancy with ornate close cuts, impossible angles or sharp edges.  Trace pieces that can be easily cut from the glass and assembled into a suncatcher.

(Note:  There are several software programs that claim they can make a photograph into a stained glass pattern.  Look for additional posts on this topic.)

Once the tracing is complete, just proceed with your project as you would with any other stained glass suncatcher pattern.  Reference
  • Cut
  • Foil
  • Tack and solder
  • Clean
  • Patina
  • Enjoy!  

Arts & Craft Books

Saturday, November 9, 2013

Fun With Bottles

If you're into stained glass, you can have fun with bottles and recycle them by incorporating them into your stained glass projects.

How to make them part of your stained glass project is entirely up to your fertile imagination however, here are a couple of ideas you may want to consider.

Cut off wine bottle bottoms to create unusual stained glass windows or wall hangings.

Use your grinder to reduce the edge thickness of the bottle bottoms to match the stained glass you are using, foil and then solder together as you would any other stained glass project.

Cut the bottoms off various sizes of different colored bottles to create unique wind chimes.

   Once the bottoms have been cut off, grind the edges even, drill holes in them about 1/4" in from the edge and tie them together using monofilament or PowerPro Braided Spectra Fiber Micro Filament Line - 100-150 Yards.

Wall hangings and panels are a great way to use the bottoms of colored bottles or a bottle cut in half lengthwise.

The video below shows how to cut a bottle in half lengthwise using a band saw.  The trick is to go slowly and let the blade do the work.


The idea of cutting the tops of bottles to make a set of drinking glasses has been around for years.

Once you cut the bottles tops off (using the method of your choice) you need to smooth the edges so they are suitable for drinking.

The best and easiest way to achieve a "factory" edge on your newly created drinking glass is to use a propane or Mapp Gas plumbers torch.

Mapp gas burns hotter than ordinary propane so pay attention when heating up the glass.

Once you adjust the torch to get a blue flame, heat the entire glass evenly and gradually concentrate on keeping the flame on the rough edges around the rim.  The sharp edges will eventually melt into a bead.

Heating the glass EVENLY is important to keep the glass from shattering.

Personally, I don't like drinking from "bottle" glasses because of their rim thickness.  I prefer using the cut bottles for indoor planters or making wind candles.

Some stained glass artisans have fun with bottles by breaking or cutting different colored bottles into manageable pieces and using them in suncatchers or wall hanging projects.

(This requires a kiln to slump or flatten out the pieces.)

The video below shows one method of cutting the tops off of bottles using the Gryphon C40 glass cutting band saw.


Another method I use on a regular basis that works just as well requires a jig and is less costly, but takes longer.

First you need to make a simple jig using 3/4" (1x4) pine boards and a few sheet rock screws or glue to hold the bottle secure when scoring.
  • Cut two pieces of the 1x4 about 16" to 18" long and screw or glue them into a "V" shape.  
  • Next make the bottle stop by screwing or gluing a 7" or 8" piece of 1x4 to one end of the vee.  The bottom of the stop needs to be flush with the bottom of the vee.
  • You can add a hand rest if you like by screwing another piece of 1 x 4 to the shorter side of the vee and to the back of the bottle stop.
That's all you need to hold most bottles secure enough to make an even cut around the circumference of the bottle.

Place the bottle in the jig with the bottom flush against the stop and cut around the circumference with your glass cutting tool by rotating the bottle slowly and keep the cutting wheel on the glass until it meets on the other side.

As soon as the bottle is scored, you need to tap the score from the inside with a "tapping" tool to break off the top of the bottle.

You can either purchase a tapping tool or make one from a length of brass rod bent at the end with a nut or some other weight soldered up from the bend to add weight.

The list for having fun with bottles is endless, but the main trick is learning how to cut the bottles easily without hurting yourself in the process.

Arts & Craft Books

Saturday, September 21, 2013

Using Glass Beads In Your Suncatchers

Using glass beads in your suncatchers is an easy inexpensive way to brighten up your stained glass creations.


Flat oval or round glass beads have a variety of  end uses.

They are commonly used in mosaics, jewelry, stained glass lamp shades, wind chimes, wall hangings and even on the bottom of tropical fish bowls as a substrate.

Flat oval beads are the most suited for use in stained glass suncatchers because of their reflective qualities and because they are relatively easy to foil.

Round beads can be used but they are much more difficult to foil and solder into a project.

When added to your stained glass suncatcher projects, glass beads provide a "custom" touch that easily distinguishes your creation from others, even when using identical patterns.

Oval glass beads are made in a host of colors but for use in stained glass suncatchers, we recommend using opaque, translucent or clear colors to get the most light distribution.

Incorporating glass beads into your suncatcher creation is easy.

Just clean the glass beads like you would the rest of your stained glass and foil the edges in the same manner.

Make sure that the foiled edges are burnished well before you begin to solder the beads into your pattern.

This will eliminate any possibility of the beads popping out of the finished piece at a later time.

You can purchase flat oval glass beads at any arts and craft store or online.  EBay and other online auction sites are good sources for a cheap supply of beads.

If you haven't thought about using glass beads in your suncatchers and you want to create something a bit more unique, give it a try!

Arts & Craft Books

Tuesday, December 25, 2012

Simple Tips For Using Copper Wire In Suncatcher Construction

Using copper wire in suncatcher construction is something you can easily take advantage of when constructing suncatchers.

Copper wire is used in various gauges throughout the united states and world wide in hundreds of thousands of applications.    

In addition to being readily available, it isn't overly pricey considering the increased rise in copper prices.

When using copper wire in suncatcher construction you need to first tin the wire.

Although you can purchase pre-tinned copper wire in various gauges from any art glass house, you can do it yourself and save yourself some money, especially if you know an electrician who can give you some scrap wire.

Strip off the insulation with a pocket knife and pull the wire through a piece of folded sandpaper to brighten it up and remove any residual coating.

Then simply apply a good coat of flux to the bright wireand tin it like you would with foil.

Copper wire comes in various diameters and is measured by guage. (see below)


The higher the gauge number of the wire, the thinner the wire.

A common 16 gauge copper wire is used in many household applications such as for outdoor extension cords, etc. and is heavier than a higher numbered 20 gauge wire.

A 16 gauge or heavier wire is frequently used in stained glass suncatcher construction for insect antennae, legs, flower stems, bird beaks, etc. 

It is used in box constructions for hinges or in corners to add durability to the finished project.

Lighter gauge wire is often used for augmenting the patterns on stained glass projects in order to provide a more realistic looking finished product.

These applications include fish scales, bird feathers, flower petal veins, etc. 

Wrap a piece of tinned copper wire around a pencil or dowel to make hanger rings for your finished suncatcher projects.

You can also use "tigertail" to hand your suncatchers.

Tigertail is made up of multistrands of very fine wire twisted together to form a thin diameter cable. The multi-strand "cable" is then usually coated with plastic or nylon to create a tough and resilient small diameter wire that is used in jewelry making, "beading" or to hang suncatchers.

You can strip off the coating from tigertail or any multistranded copper wire, tin it and use it as an overlay for your project.  You can make some neat plant leaves, bird feathers, fish scale patterns, etc.from it and once tinned tack it to the seams in your suncatcher for "effect".


Although it is generally used in jewelery making, it has been found to be a very strong and quite invisible wire for hanging stained glass suncatchers.

Another obvious reason for using copper wire in suncatcher construction is to strengthen larger projects and to add rigidity.

Single strand copper wire in itself does not add much to the strength of a suncatcher or panel however, copper braid or stranded wire can be integrated into the joints of foiled work to substantially strengthen a project.

When tinned, the braid picks up more solder and becomes extremely stiff.   When impregnated with the solder, the tinned braid becomes much stronger than the solder itself or a tinned single strand of copper wire of the same diameter.

The purpose of reinforcement is to prevent sagging or bowing in the middle of a panel or large stained glass suncatcher, so make sure you extend the tinned braid to the frame on each side of your project.

I'm sure you can find many other ways of using copper wire in stained glass construction, just use your imagination.


Arts & Craft Books

Tuesday, May 8, 2012

Using Beveled Glass For Suncatchers

Although beveled glass is normally used in the construction of wall hangings and panels, using beveled glass for suncatchers is not an uncommon practice.

Since beveled glass is normally made by grinding a 1/4" thick bevel on only one side of the periphery, a hanging suncatcher will obviously have one good side and one "flat" side when hung.

Regardless of that fact, beveled glass for suncatchers does provide an interesting effect.


The bevels in the pattern act as small prisms which create unique color diffractions that display a spectrum of colors that highlight the work as the suncatcher hangs and spins in the sunlight.

The added color spectrum that beveled glass patterns provide to suncatcher projects is usually absent in clear stained glass suncatchers.

You can purchase beveled glass cluster arrangements in a plethora of designs which can vary from simple three to four piece designs, to more complex combinations of many pieces.

Simple three or four piece designs are usually used in suncatchers, small wall hangings and occasionally in window transoms.

The more complex beveled glass designs are normally used in larger wall hangings, glass entrance doors and entrance door "side lights".
 
Victorian Flower Bevel Cluster

The  Victorian Flower Bevel Cluster  above can be used in either application.

When using beveled glass with clear and colored textured stained glass designs, novices might find the difference between glass thicknesses a problem during construction.

Typically, textured glass is 1/8" thick and has a distinct visible texture, while beveled glass is 1/4" thick.

However, the angle of the bevel makes foiling and soldering of the two glass thicknesses a relatively simple matter.

The trick is to take time with your foiling to ensure that the foil sticks on the glass securely.  This applies to all stained glass construction.

The combination of beveled glass juxtaposed to textured stained glass creates dramatic visual effects in almost any project, especially stained glass suncatchers.

If you have not yet used them, why not  try using beveled glass for suncatchers in your next project?


Arts & Craft Books

Saturday, November 26, 2011

Hanging Stained Glass Suncatchers

Arts & Craft Books


There are several methods of hanging stained glass suncatchers once they are ready for sale or just to admire next to your window.

Hanging hooks are are most frequently used and can be purchased in several shapes and sizes for specific types suncatcher projects.

In addition to hooks for suncatchers, wood and metal frames, there are several types of retainers for stained glass cabinet inserts that are available.


Hooks for hanging wood framed stained glass projects.

Any time you hang a stained glass project in a wooden frame, make sure the hooks are placed on the sides of the frame. Not on the top.

The weight of the stained glass will over time cause the frame to bow if you attach the hangers to the top frame member.

This applies to frames made from any material.
  • Panel roll hooks are sold in pairs with the screws needed for mounting and are the most common type of hanger for wood frames. 

    These brass plated hooks can be purchased from any stained glass supply house or from your local Lowes or Home Depot.
  • Side mount picture frame hooks can also be used for mounting wood framed stained glass projects. 

    These are also brass plated and come with mounting screws in packs of 1 pair to up to 50 pairs.

When hanging metal framed mounted staing glass projects, you can use hanging rings, came framed Handy Hangers or glass clips.

Rings

Rings are the most commonly used for hanging stained glass suncatchers and panels. They can be purchased in bulk packs in brass or silver and come in 1/4", 3/8' or 1/2" diameters.

You easily can make your own rings with single or multiple strand copper or silver wire wrapped around a pencil or dowel of the correct diameter.

Snip off the excess wire and leave a tag long enough to tack solder the ring to the metal frame.

Make sure to tin the copper or silver ring before soldering to the metal frame.

Came framed Handy Hangers


Handy Hangers - 5 Pr
are installed in the metal frame to become an integral part of the frame. They can be purchased in packs of 5 or more pairs at a resonable cost. The picture below links to the installation procedure.


Handy Hangers - 5 Pr


Glass Clips

Clear polycarbon glass clips are sold in packs of up to 25 and make for a simple secure installation. Glass clips allow about an inch of space between the window and stained glass project for air circulation and are easily removed for cleaning.

For stained glass cabinet inserts you can use either polycarbon glass clips or metal retaining clips.

Polycarbon glass clips are the kind you buy for mounting mirrors and other glass panels. They come in packs of four or in bulk in packs of 50 and can be purchased in most hardware stores.

Metal retaining clips are a simple inexpensive way to secure a stained glass panel inside the rabbet of a cabinet door. Screw the clips so the retaing button extends just over the edge of the rabbet enough to securely hold in the glass panel.

Again, you can purchase retaining clips and mounting screws in any hardware store in bulk packs at a reasonable price.


When hanging stained glass suncatchers; rings and hanging wire are your best bet.

Many people use suction cups to hang their projects directly to a glass window pane. These are available in many sizes in bulk packs at a reasonable cost.

Just remember one thing. There are times in humid climates when suction cups let go and your stained glass project will hit the floor.  Believe me, it happens more than you think!

Excess humidity, an unintentional bump or a window blind hitting the suction cup, can create a disaster to your valued suncatcher project.

A better more secure method of hanging stained glass suncatchers is the ring and wire hanger method.

As described above, tack on your hanger rings and then run picture wire, heavy fishing monofilament or even single strand wire fishing leader material through the rings.

Secure with wire connectors of the proper diameter and crimp securely with crimping pliers.

Hang from the ceiling with screw in hooks, toggle hooks, etc.

This method is much more secure than using suction cups to showcase your suncatchers.

Monday, July 4, 2011

How To Properly Solder Your Lead Came Suncatcher Projects

How To Properly Solder Your Lead Came Suncatcher Projects

Learning how to properly solder your lead came suncatcher projects is not difficult but there are some tricks you need to be aware of.

It's true that anybody with a soldering iron and some flux can solder but to make your stained glass project look really professional try out this method of soldering lead came.

Temperature is extremely important.

Regardless of what type project you are working on, the temperature of your soldering iron is critical.

An iron that is too hot will cause the solder to actually bubble. An iron that is too cold causes uneven solder joints.

Test the temperature of your soldering iron on a piece of lead came. If it melts the lead came your iron is way too hot.

Reset your thermostat and wait a few minutes until the temperature evens out and try again.

The iron should be hot enough for the solder on your project to flow evenly but not so hot that it actually melts the lead came.

Brush soldering flux onto the lead came joint, place the solder over the joint and apply the flat surface of your soldering iron over the solder until it melts and just covers the intersection of the lead came joint.

A common error newcomers make is to apply too much solder to the joints.

This causes a ball or a ridge to form at the intersection of the joint and makes the finished piece look very unprofessional.

I can't stress this too much; DO NOT use an excessive amount of solder on the lead came joints.

Use juse enough solder on the joins to keep it small and flat around the edge.

Once one side of your project is complete, turn it over and solder the reverse side.

When your iron is at the correct temperature, you won't have any problems with solder bubbling, balling, ridging or flowing through to the other side of the piece.

A good soldering iron and thermostat will make the job of soldering easier but nothing replaces a lot of practice.


Inland Studio Professional Soldering Iron Mika 100w Studio Line Soldering Iron - International Voltage

Hakko 556 Soldering Iron

Click on the pictures for an item description.

Mini Phaser Temperature Controller Mika Tempright Temperature Controller


Remember, "practice makes perfect!"

Learning how to properly solder your lead came suncatcher projects is a very important step that you must master if you plan to create professional looking stained glass products.

Friday, June 3, 2011

How To Bevel Plate Glass

Learning how to bevel plate glass is something for more the experienced stained glass artisans to tackle, however it's a relatively simple process that only requires some basic instruction, good equipment and some practice.

Beveling is done in four steps:
  • Step 1 - Roughing
  • Step 2 - Smoothing
  • Step 3 - Rough Polishing
  • Step 4 - Finish Polishing
Step - 1:

After learning how to cut plate glass correctly for beveling, each piece in your pattern must then get a rough bevel. This step is is called roughing.

A 100 grit electroplated diamond disc is usually used for rough shaping or roughing. Like rough sandpaper, it gives the initial bevel shape to the glass and produces a very rough surface that looks like a sandblasted or etched surface.

This step rough shapes the bevel on the glass to within 1/32" of the finished piece.

Step - 2:

The second step is smoothing. This step removes the deep scratches from the roughing step and gives the bevel closer to its final dimension. Like sandpapering wood, this step simply uses a finer "grit" wheel (400 or 600 grit) that grinds the rough bevel on the glass closer to it's final finished appearance.

A good smoothing or a rough bevel cut will make the surface perfectly flat and give it a satin like appearance without any surface imperfections or scratches.

Step - 3:

The third step which is called rough polishing takes away the satin finish that was created in the smoothing process and leaves a hazy looking surface on the glass. In this step, any facets that remained from step #2 are removed by a fine grit diamond disc which also makes the bevel more transparent.

Step - 4:

Finish polishing is the final step to the beveling process. It removes any frost or haze that remains from the rough polishing process on the bevel.

In this step a cerium oxide water mixture is used on a felt disc or wheel to give the bevel a high gloss sheen.

This step takes much more time than the previous steps, so don't rush it.

You will find that the more you work at it, the easier it is to make a "perfect bevel" on plate glass patterns for suncatchers, wall hangings or a zillion other applications.

Glastar G-15 Bevel Star Grinding And Polishing System

The Glastar G-15 Bevel Star Grinding And Polishing System pictured above is a complete, multi-functional beveling station that is designed for grinding and polishing straight edges and outside curves.

The Bevel Star comes with all the features you need to simply and easily create, repair and hand bevel your own glass projects.

Learning how to bevel plate glass "perfectly" doesn't just happen overnight, however most users experienced in stained glass should be able to create near perfect bevels with just a few hours of practice using good equipment.

Friday, January 7, 2011

Some Basic Soldering Techniques For Suncatchers You Should Know

There are some basic soldering techniques for suncatchers you should know about before you actually begin construction of your project.

Some basic knowledge about the composition of solder is needed, before you begin using it to construct your suncatcher projects.

With the exception of lead free solder which has no lead in it; there are basically three types of tin/lead alloy solders that are used in stained glass construction.

Generally, the higher the ratio of tin to lead; the easier the solder will flow at lower temperatures.
  • The most commonly used solder in "Tiffany" style lamp and box construction, is 50/50 solder. This is a 50% tin and 50% lead composition.
  • The most commonly used solder in lead and copper foil construction, is 60/40 solder. This solder is composed of 60% tin to 40% lead and is easier to work with.
  • For decorative soldering, the most commonly used solder is 63/37. This solder is composed of 63% tin and 37% lead and is easiest to work with at lower temperatures.
Since solder does not stick to glass, each piece of glass must be either wrapped in copper foil or encased in lead came before it can be made into a project.

Solder will not bond properly to other metals without the use of flux. In order for solders to flow smoothly and bond to came or copper foils, a good flux must be applied to both pieces that are to be soldered.

Tip: Never use an rosin or acid core solder for stained glass sun catchers. Use only solid core alloys of solder.

The following basic soldering techniques apply to all types of stained glass construction:
  • Before you are ready to foil and solder your project; all of your pieces must first fit together snugly.
  • Although you can easily fill gaps up to 1/8" wide with solder, your project will have a more professional look with equally wide solder joints. You don't need any space between foiled pieces.
  • Once your pieces are cut, you are ready to foil. Clean each piece of glass with soap and water to clear off any cutting oil or grinder dust.
  • When thoroughly dry, wrap each piece with copper foil and burnish it securely to the glass.
  • When all the pieces are foiled, arrange them in proper order on a flat heat resistant surface.
  • With a flux brush, sparingly apply a small amount of flux to each joint and tack the pieces together with a small amount of solder. All you are doing here is holding the pieces of your project together.
  • Your next step is to apply a light, even coating of flux on all the rest of the seams.
Tip: If you apply too much flux, your solder will spatter and create small pits or bubbles in your solder seam. If you apply too little flux, it will leave irregular solder seams and uncovered foil in your project.
  • Finally you can begin to solder the balance of the seams in your project.
Here are some basic soldering techniques for you to follow:

You will need to heat your iron to a temperature that will melt the type of solder you are using to a liquid state. This is about 700 degrees F.
  • Occasionally wipe the tip of your hot iron on a wet sponge to keep a "glossy" coating on the tip.
  • Hold your iron the same way you would hold a knife. Your fingers should be curled around one side of the handle, with your thumb on the other side.
  • The narrow side of your iron's tip should be closest to the seam of your project. The wide flat part of the iron's tip should be facing "side to side".
  • Hold the roll of solder in your opposite hand, with about 6" or 7" uncoiled and straightened somewhat to touch your hot iron.
If you're right handed, it's easier to work from right to left.

If you are left handed, work from left to right.


  • Start soldering about 1/4" from the edge of the seam.

    Feed the solder against the wide flat surface of the tip as you lightly touch the iron to the foiled seam. The solder should puddle under the iron tip and you will hear a sizzle from the flux heating up.

    Slowly move the tip of the iron across the foiled seam with your right hand, as you slowly feed the solder coil against the tip with your other hand.
  • If your solder seam is flat, slow down and use more solder. If the solder is pouring onto your glass, speed it up a bit. Try for a moderate continuous speed and try not to stop until you are finished with your seam.
Good soldering takes patience and some practice. You will probably need to complete several sun catchers before you get to the point where your seams look like a Tiffany lamp.
  • Don't keep going over a seam if you don't like the way your solder seam looks. Applying too much heat in one place can cause your glass to break.

    It's better to move on and come back to touch it up a bad seam later. You can always apply more flux and go back over the seams after they have cooled.
  • Once you've completed one side of your piece, carefully turn it over and repeat the procedure on the other side.

    Be careful when you turn over a large piece. Hold your project on the edges near the center of the piece. Don't turn over a large piece by picking it up from the top or you could bend it or split it in the middle.
It's not necessary to tack the second side of your project, just put a small amount of flux on the seams and solder away!
  • If you are using lead came to edge your project, don't run your seams all the way to the edge of your piece. Stop soldering about 1/4" before the edge of the piece so you can butt the came up to the solder joint.
  • If you are not using came to edge your project; just run the seam all the way to the edge of your sun catcher and tin the foiled edges.
These basic soldering techniques will get you going but in order to achieve perfection, you will need to practice on a lot of projects.